1 In this example , i am going to show Spring Portlet Example
2 Environment:
Portal Server v6.1 ,Rad v7.5
Step3:
File>New> Select PortletProject>Project name(like AjaxSpringPortlet)>Choose the Target Runtime Server(like WebSphere Portal v6.1) and Portlet Type(Basic Portlet) like below
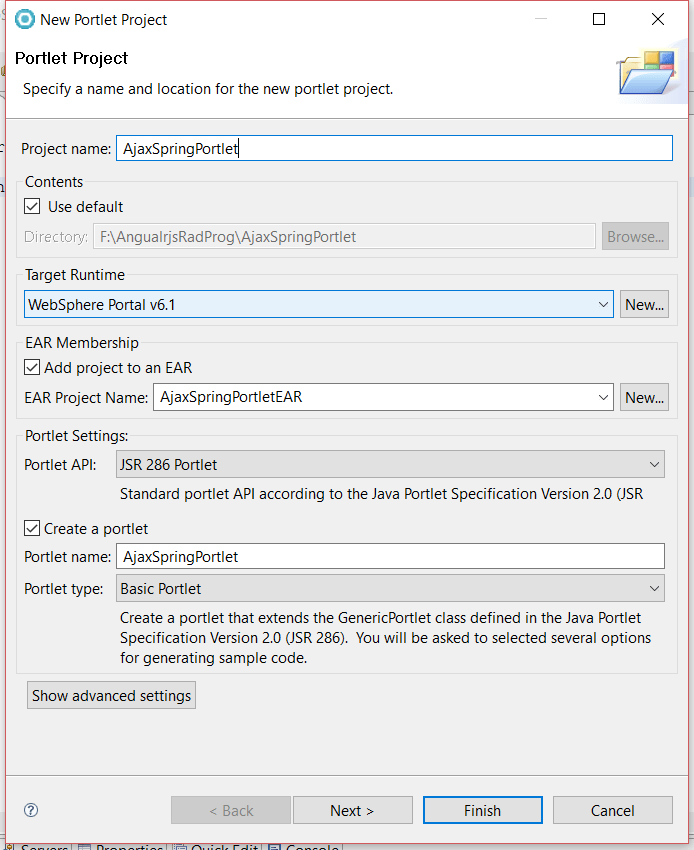
=>Click on Next >Next>Finish
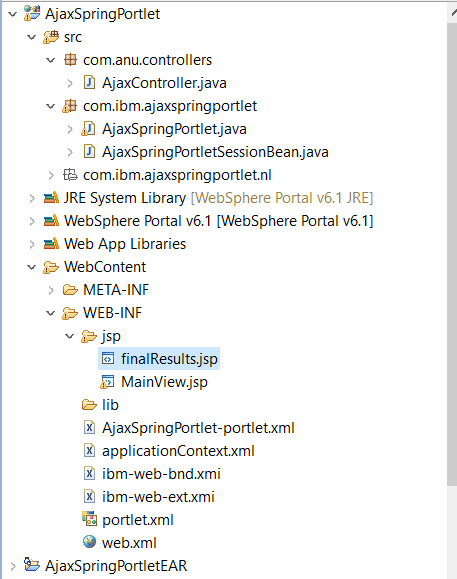
Step 4: Project Structure like below
Step 5:
Create the folder in WEB-INF (like folder name is jsp) like below
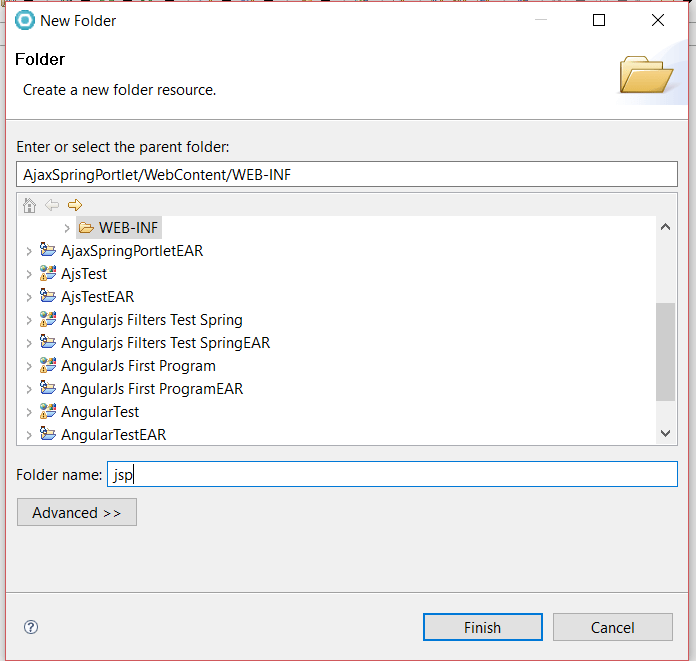
=>Click on > finish.
Step 6:
Then Select the jsp folder >Right click on > New>WebPage> Write the File Name like below
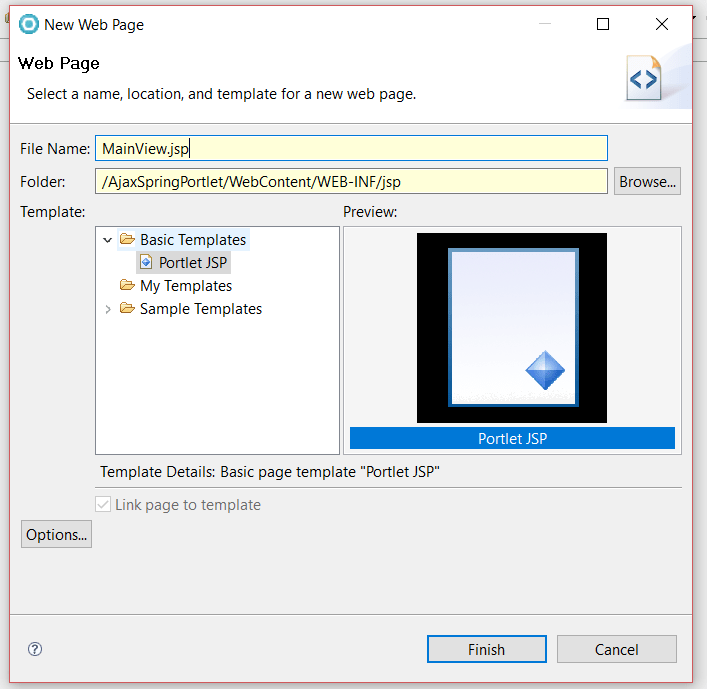
Click on > Finish
MainView.jsp like below
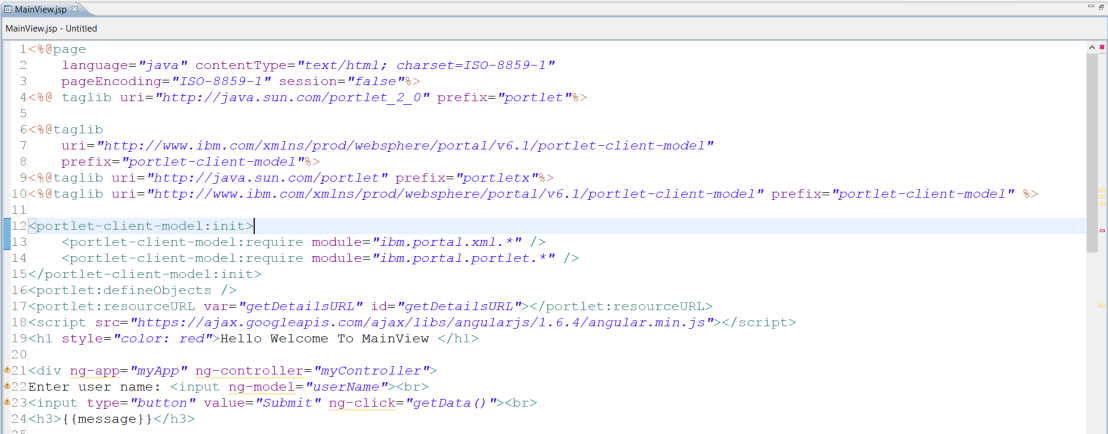
Code MainView.jsp:
<%@page
language=“java” contentType=“text/html; charset=ISO-8859-1”
pageEncoding=“ISO-8859-1” session=“false”%>
<%@ taglib uri=“http://java.sun.com/portlet_2_0” prefix=“portlet”%>
<%@taglib
uri=“http://www.ibm.com/xmlns/prod/websphere/portal/v6.1/portlet-client-model”
prefix=“portlet-client-model”%>
<%@taglib uri=“http://java.sun.com/portlet” prefix=“portletx”%>
<%@taglib uri=“http://www.ibm.com/xmlns/prod/websphere/portal/v6.1/portlet-client-model” prefix=“portlet-client-model” %>
<portlet-client-model:init>
<portlet-client-model:require module=“ibm.portal.xml.*” />
<portlet-client-model:require module=“ibm.portal.portlet.*” />
</portlet-client-model:init>
<portlet:defineObjects />
<portlet:resourceURL var=“getDetailsURL” id=“getDetailsURL”></portlet:resourceURL>
http://em
<h1 style=“color: red”>Hello Welcome To MainView </h1>
<div ng-app=“myApp” ng-controller=“myController”>
Enter user name: <input ng-model=“userName”><br>
<input type=“button” value=“Submit” ng-click=“getData()”><br>
<h3>{{message}}</h3>
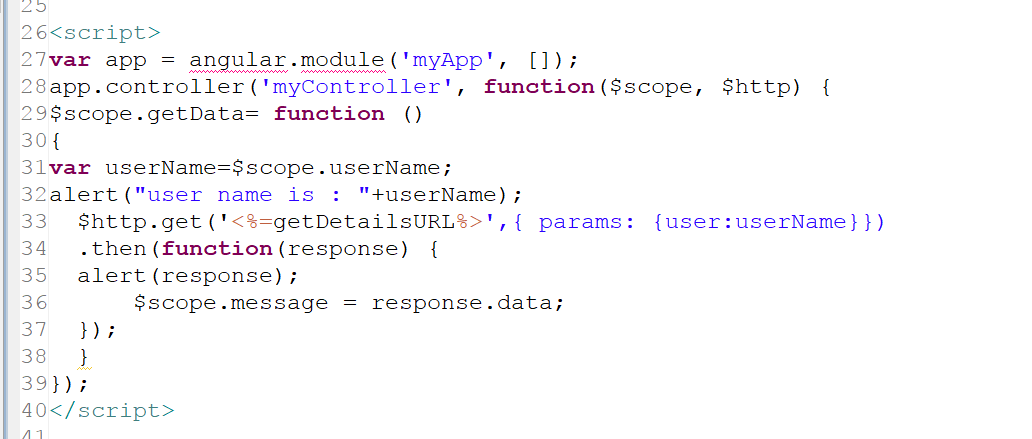
var app = angular.module(‘myApp’, []);
app.controller(‘myController’, function($scope, $http) {
$scope.getData= function ()
{
var userName=$scope.userName;
alert(“user name is : “+userName);
$http.get(”,{ params: {user:userName}})
.then(function(response) {
alert(response);
$scope.message = response.data;
});
}
});
Step 7:
Create the class:
Right click on the project under src >select the >class> and write the class name (like AjaxController.java) like below
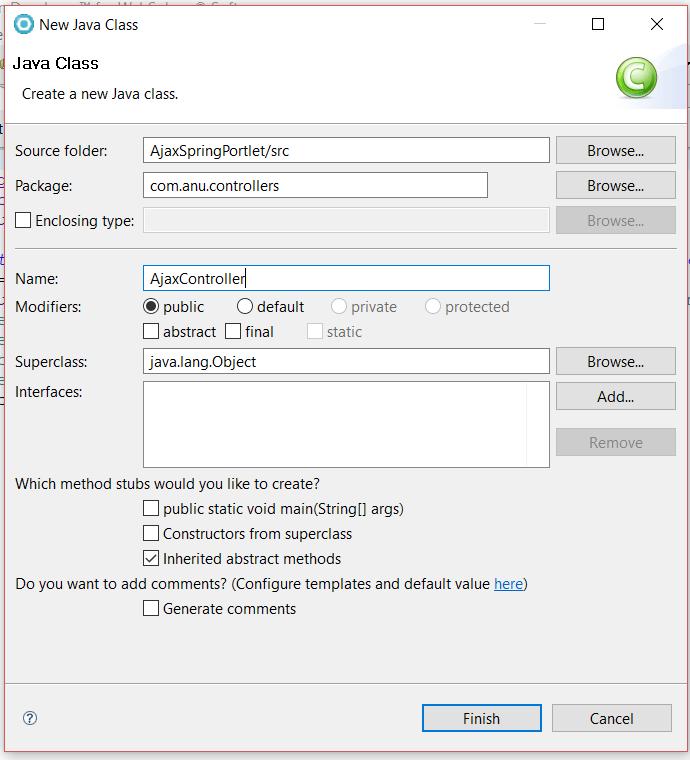
Click on> Finish
AjaxController.java like below
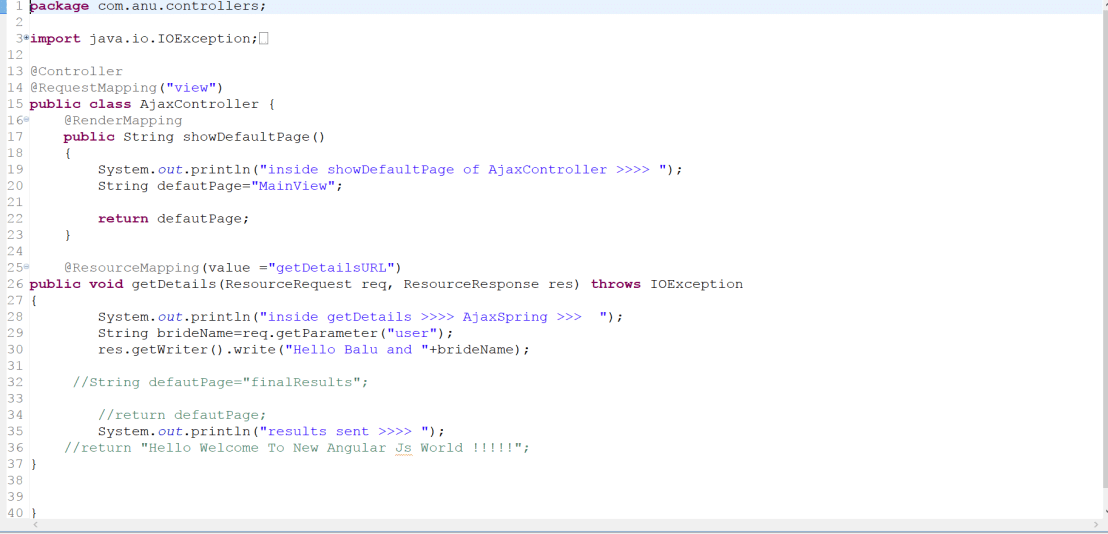
Code: AjaxController.java
package com.anu.controllers;
import java.io.IOException;
import javax.portlet.ResourceRequest;
import javax.portlet.ResourceResponse;
import org.springframework.stereotype.Controller;
import org.springframework.web.bind.annotation.RequestMapping;
import org.springframework.web.portlet.bind.annotation.RenderMapping;
import org.springframework.web.portlet.bind.annotation.ResourceMapping;
@Controller
@RequestMapping(“view”)
public class AjaxController {
@RenderMapping
public String showDefaultPage()
{
System.out.println(“inside showDefaultPage of AjaxController >>>> “);
String defautPage=”MainView”;
return defautPage;
}
@ResourceMapping(value =”getDetailsURL”)
public void getDetails(ResourceRequest req, ResourceResponse res) throws IOException
{
System.out.println(“inside getDetails >>>> AjaxSpring >>> “);
String brideName=req.getParameter(“user”);
res.getWriter().write(“Hello Balu and “+brideName);
//String defautPage=”finalResults”;
//return defautPage;
System.out.println(“results sent >>>> “);
//return “Hello Welcome To New Angular Js World !!!!!”;
}
}
Step 8:
Create the (AjaxSpringPortlet-portlet.xml ) file like below
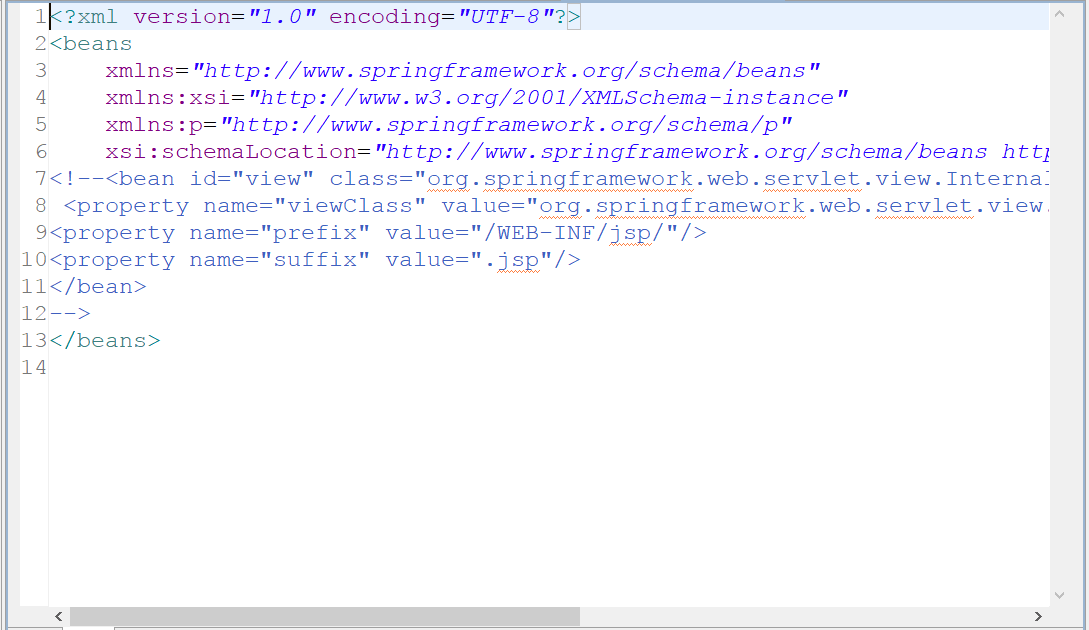
AjaxSpringPortlet-portlet.xml:

Code: AjaxSpringPortlet-portlet.xml like below
<?xml version=“1.0” encoding=“UTF-8”?>
<beans xmlns=“http://www.springframework.org/schema/beans”
xmlns:xsi=“http://www.w3.org/2001/XMLSchema-instance”
xmlns:p=“http://www.springframework.org/schema/p”
xmlns:context=“http://www.springframework.org/schema/context”
xsi:schemaLocation=“http://www.springframework.org/schema/beans
http://www.springframework.org/schema/beans/spring-beans-3.0.xsd
http://www.springframework.org/schema/context
http://www.springframework.org/schema/context/spring-context-3.0.xsd”>
<bean id=“viewController” class=“com.anu.controllers.AjaxController”/>
<bean id=“portletModeHandlerMapping” class=“org.springframework.web.portlet.handler.PortletModeHandlerMapping”>
<property name=“defaultHandler” ref=“viewController”></property>
<property name=“portletModeMap”>
<map>
<entry key=“view”>
<ref bean=“viewController”/>
</entry>
</map>
</property>
</bean>
<bean id=“view” class=“org.springframework.web.servlet.view.InternalResourceViewResolver”>
<property name=“viewClass” value=“org.springframework.web.servlet.view.JstlView”/>
<property name=“prefix” value=“/WEB-INF/jsp/”/>
<property name=“suffix” value=“.jsp”/>
</bean>
</beans>
Step 10:
ApplicationContext.xml like below
Code ApplicationContext.xml like below
<?xml version=“1.0” encoding=“UTF-8”?>
<beans
xmlns=“http://www.springframework.org/schema/beans”
xmlns:xsi=“http://www.w3.org/2001/XMLSchema-instance”
xmlns:p=“http://www.springframework.org/schema/p”
xsi:schemaLocation=“http://www.springframework.org/schema/beans http://www.springframework.org/schema/beans/spring-beans-2.5.xsd”>
<!–<bean id=”view” class=”org.springframework.web.servlet.view.InternalResourceViewResolver”>
<property name=”viewClass” value=”org.springframework.web.servlet.view.JstlView”/>
<property name=”prefix” value=”/WEB-INF/jsp/”/>
<property name=”suffix” value=”.jsp“/>
</bean>
–>
</beans>
Step 11:
Web.xml like below
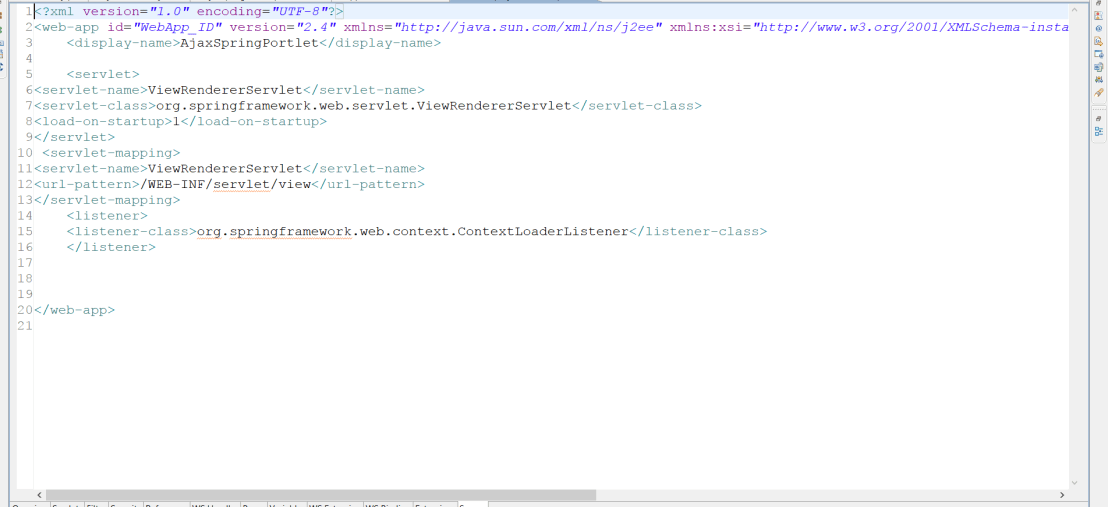
Code: web.xml :
<?xml version=“1.0” encoding=“UTF-8”?>
<web-app id=“WebApp_ID” version=“2.4” xmlns=“http://java.sun.com/xml/ns/j2ee” xmlns:xsi=“http://www.w3.org/2001/XMLSchema-instance” xsi:schemaLocation=“http://java.sun.com/xml/ns/j2ee http://java.sun.com/xml/ns/j2ee/web-app_2_4.xsd”>
<display-name>AjaxSpringPortlet</display-name>
<servlet>
<servlet-name>ViewRendererServlet</servlet-name>
<servlet-class>org.springframework.web.servlet.ViewRendererServlet</servlet-class>
<load-on-startup>1</load-on-startup>
</servlet>
<servlet-mapping>
<servlet-name>ViewRendererServlet</servlet-name>
<url-pattern>/WEB-INF/servlet/view</url-pattern>
</servlet-mapping>
<listener>
<listener-class>org.springframework.web.context.ContextLoaderListener</listener-class>
</listener>
</web-app>
Step 12:
portlet.xml like below
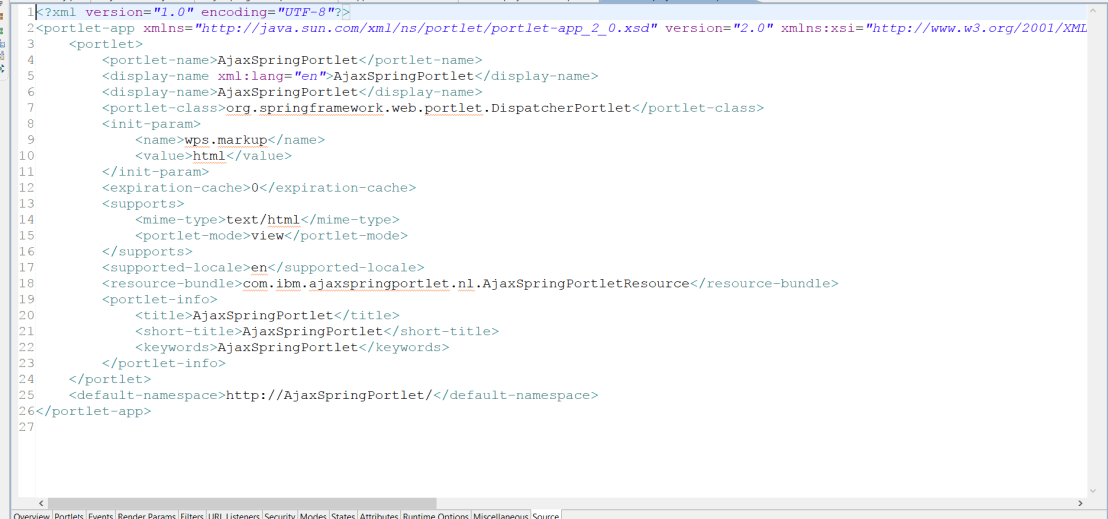
Code: portlet.xml like below
<?xml version=“1.0” encoding=“UTF-8”?>
<portlet-app xmlns=“http://java.sun.com/xml/ns/portlet/portlet-app_2_0.xsd” version=“2.0” xmlns:xsi=“http://www.w3.org/2001/XMLSchema-instance” xsi:schemaLocation=“http://java.sun.com/xml/ns/portlet/portlet-app_2_0.xsd http://java.sun.com/xml/ns/portlet/portlet-app_2_0.xsd” id=“com.ibm.ajaxspringportlet.AjaxSpringPortlet.88f77076e5”>
<portlet>
<portlet-name>AjaxSpringPortlet</portlet-name>
<display-name xml:lang=“en”>AjaxSpringPortlet</display-name>
<display-name>AjaxSpringPortlet</display-name>
<portlet-class>org.springframework.web.portlet.DispatcherPortlet</portlet-class>
<init-param>
<name>wps.markup</name>
<value>html</value>
</init-param>
<expiration-cache>0</expiration-cache>
<supports>
<mime-type>text/html</mime-type>
<portlet-mode>view</portlet-mode>
</supports>
<supported-locale>en</supported-locale>
<resource-bundle>com.ibm.ajaxspringportlet.nl.AjaxSpringPortletResource</resource-bundle>
<portlet-info>
<title>AjaxSpringPortlet</title>
<short-title>AjaxSpringPortlet</short-title>
<keywords>AjaxSpringPortlet</keywords>
</portlet-info>
</portlet>
<default-namespace>http://AjaxSpringPortlet/</default-namespace>
</portlet-app>
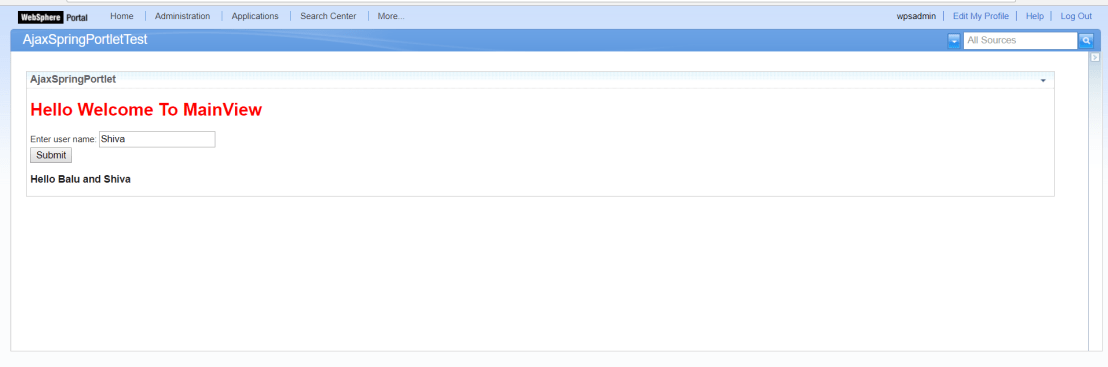
Step 12:
Result: