Creating a JDBC Provider and DataSource in WebSphere Application Server v6.1
-
Creating and configuring a JDBC provider:
- STEP 1;
-
Log on to the WebSphere Application Server Console(DMGR)
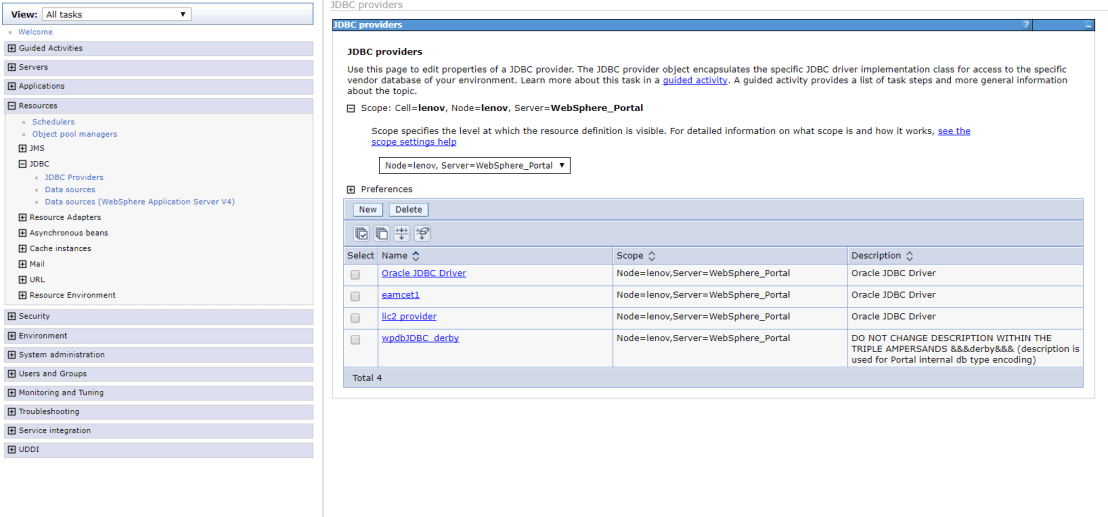
Click on Resources > JDBC > JDBC providers.> Select the Scope Node >WebSphere_Portal Like Below
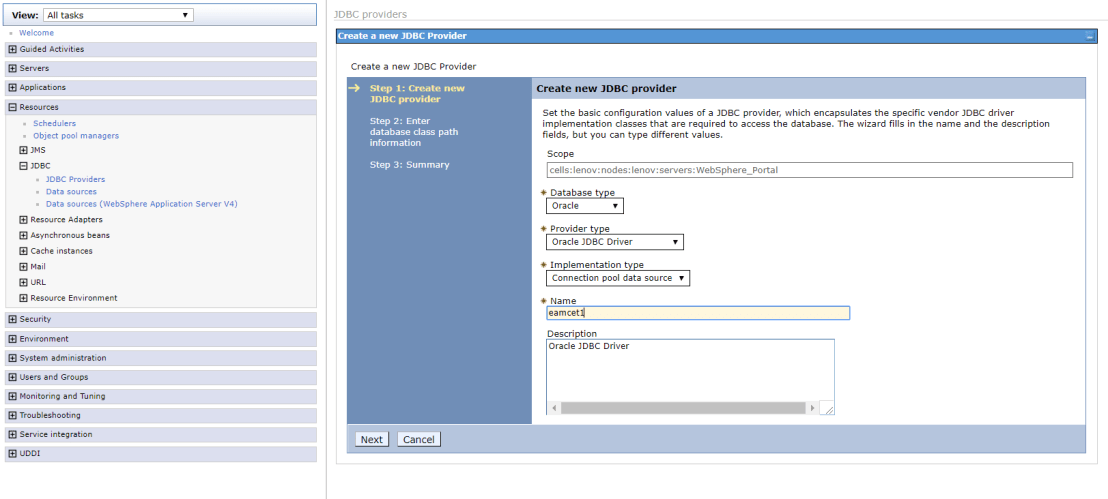
STEP 2:
And Then Click on >NEW >Select Database Type(like Oracle)And Implementation type(like Connection Pool data source)&>Name(eamcet1)Like below screen ;
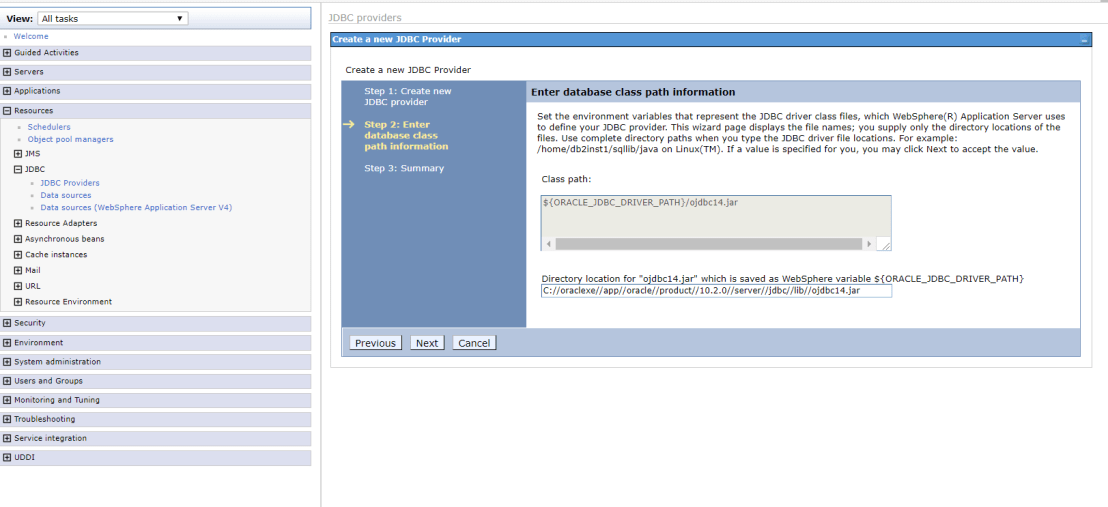
STEP 3:
Then Click on >NEXT>Copy the Oracle OJdbc path directory>Paste it Directory Location(like C://oraclexe//app//oracle//product//10.2.0//server//jdbc//lib//ojdbc14.jar) Like below
STEP 4:
Then Click on >Next>Finish>Like below;
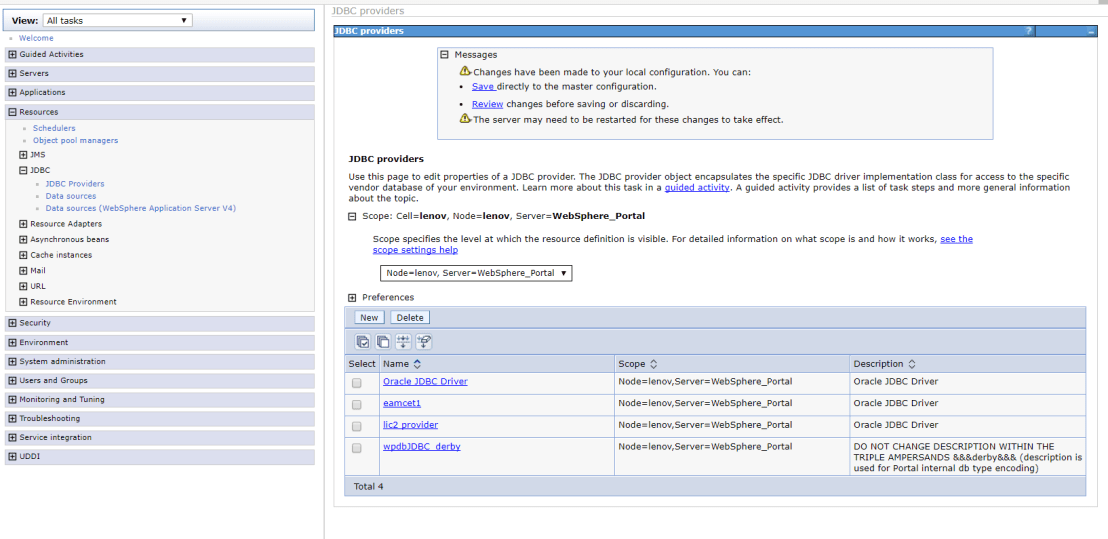
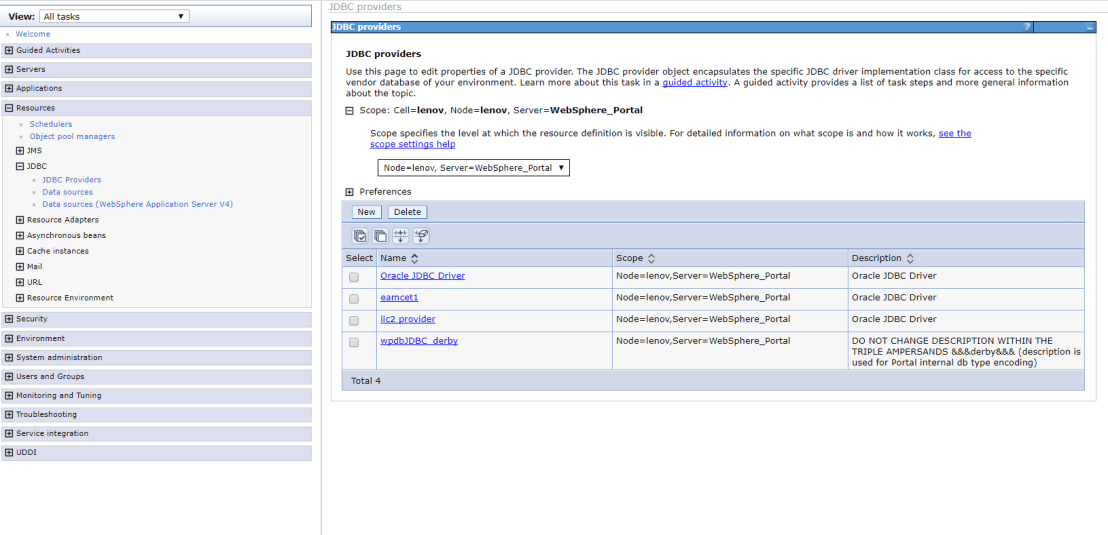
STEP 5;
CLICK on >Save> like below;
STEP 6:
And Edit Which you are created Preferece (click on like eamcet1) And Copy the ojdbc jars Paste into >Class path in General Properties (like path C://oraclexe//app//oracle//product//10.2.0//server//jdbc//lib//ojdbc14.jar) like below;
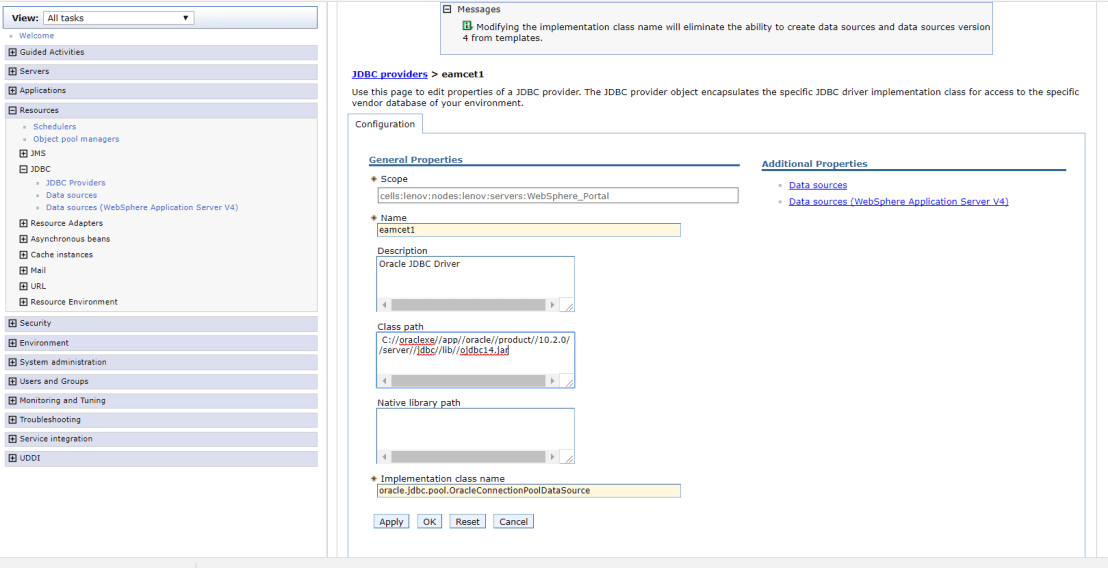
STEP 7:
And Then >Apply >Click on >OK>And >Save like below
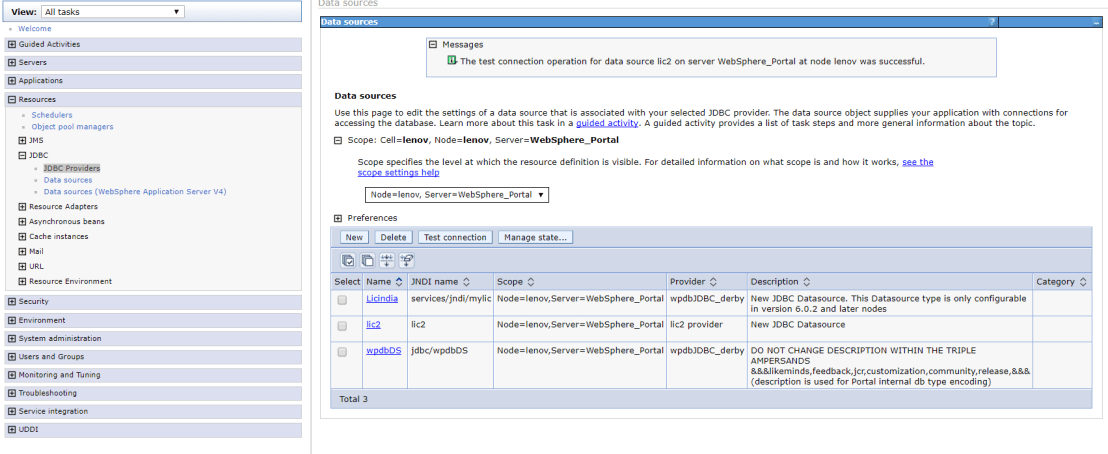
Creating a Data source:
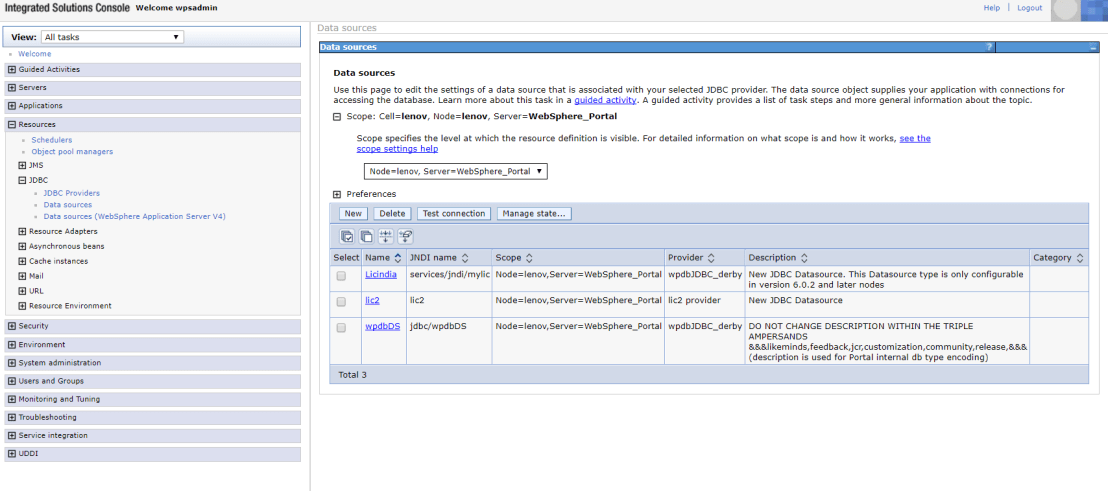
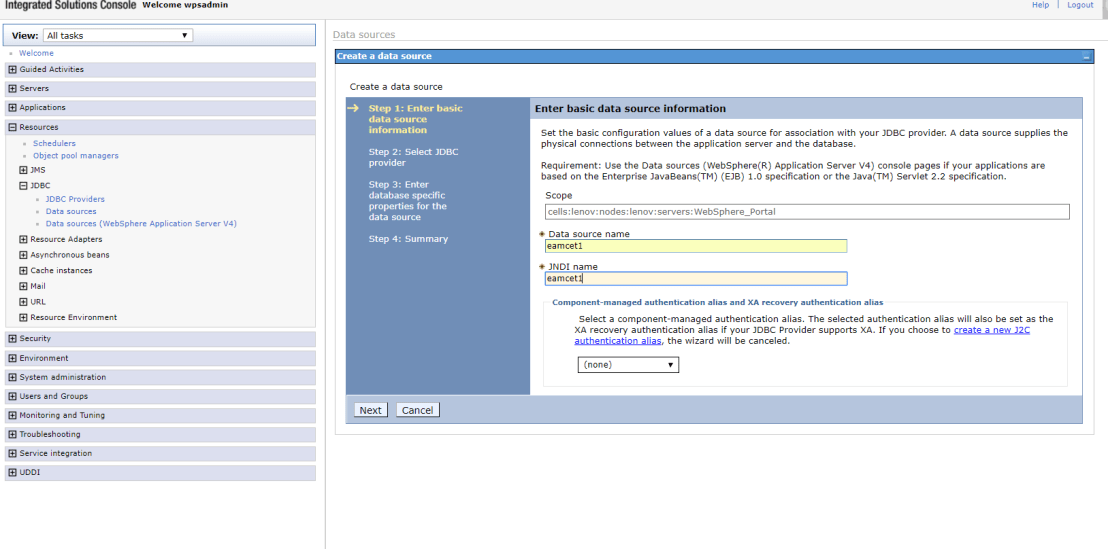
STEP 8:
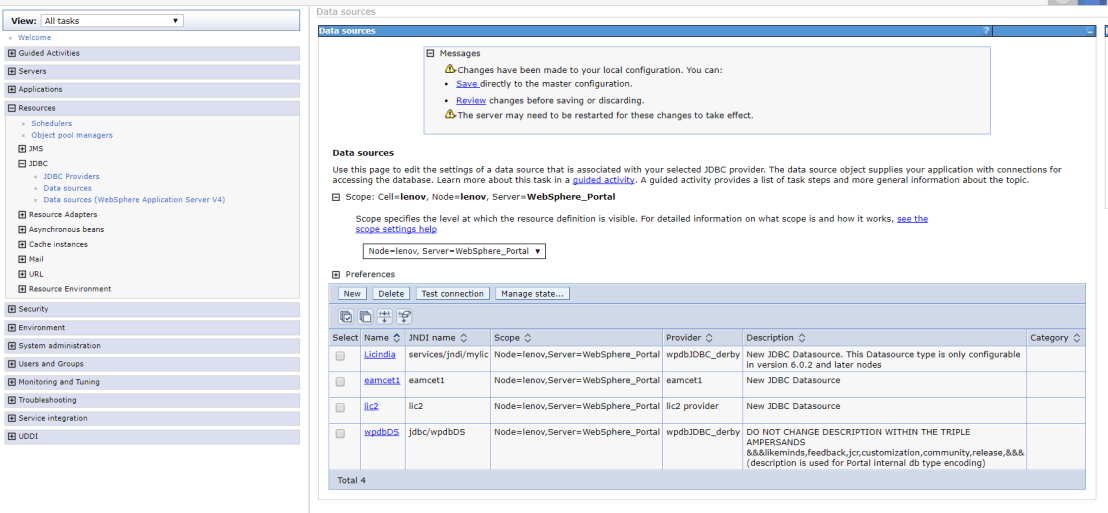
Click Resources > JDBC > Data sources. In the right pane, select appropriate scope for the data source. ( . Like Same as for Provider scope (WebSphere_Portal). like below
STEP 9:
And then click on >New>And Enter >Datasource Name(like eamcet1) >and Jndi Name (like eamcet1)>And We can create a new j2c authentication alia like below.
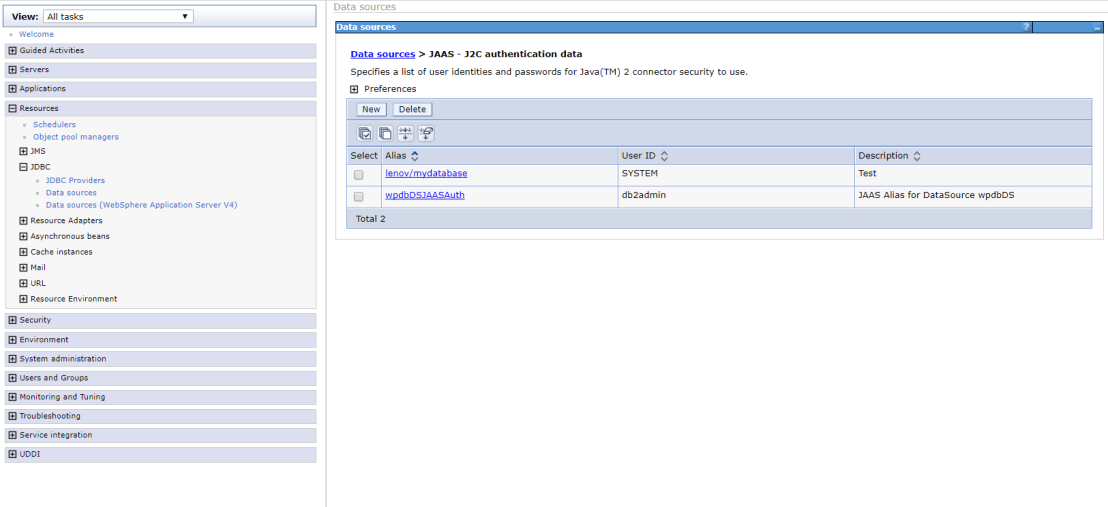
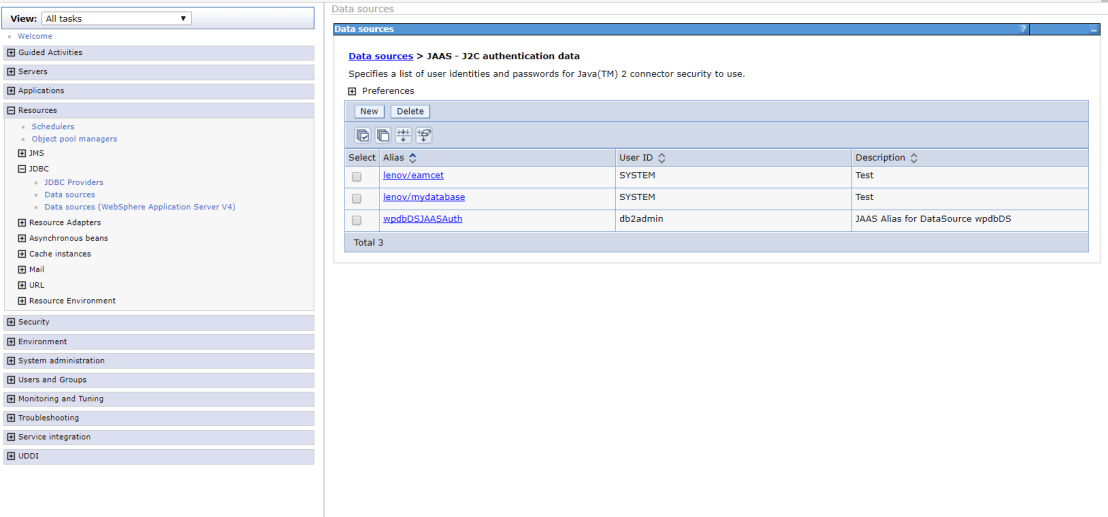
STEP 10:
And Click on >create a new j2c authentication alias like below
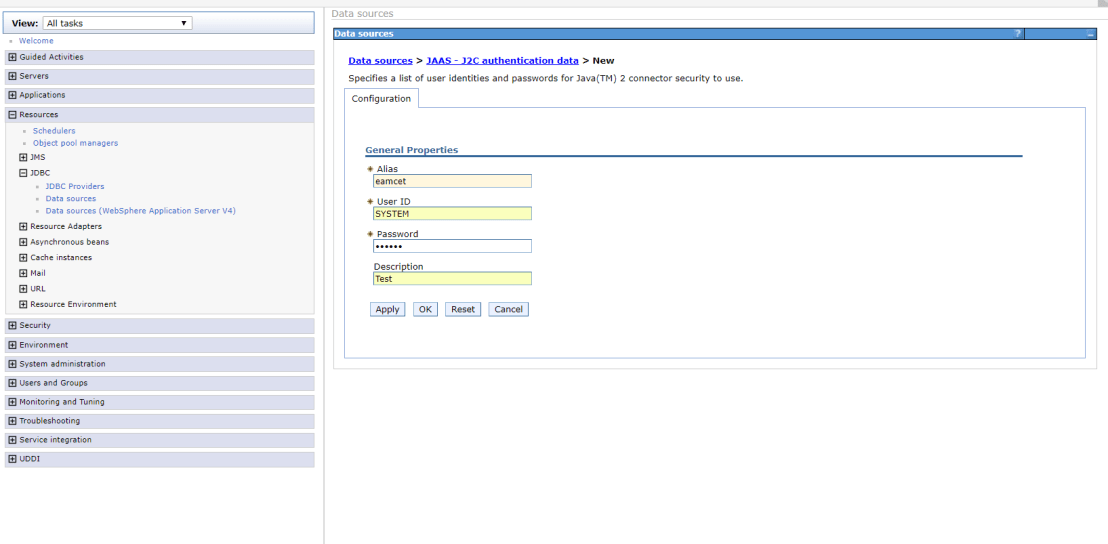
STEP 11:
Then Click >New>Enter General Properties(like Alias:eamcet>UserId(SYSTEM)>password(Manager)(Userid and password same as Oracle database) like below
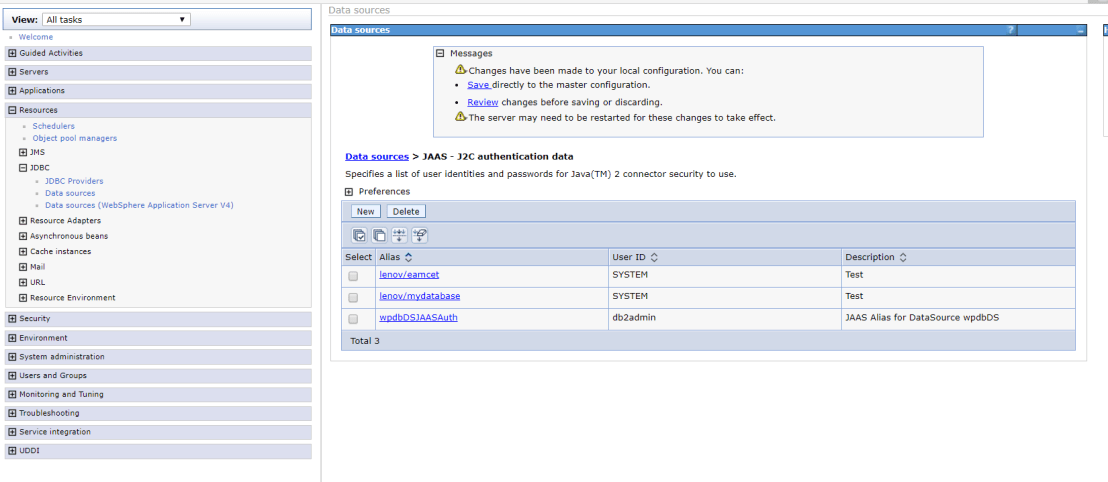
STEP 12:
Then >Apply>OK>SAVE like below Screens:
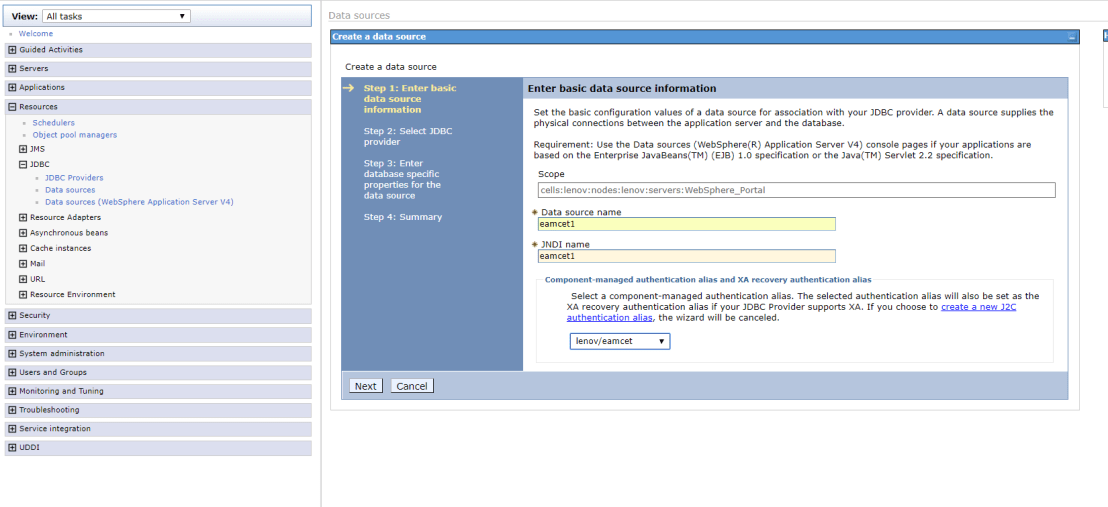
STEP 13:
And Click on>Data Source>click >NEW>Enter DataSource Name and Jndi name>Select Node(like lenov/eamcet (created j2c)) like below
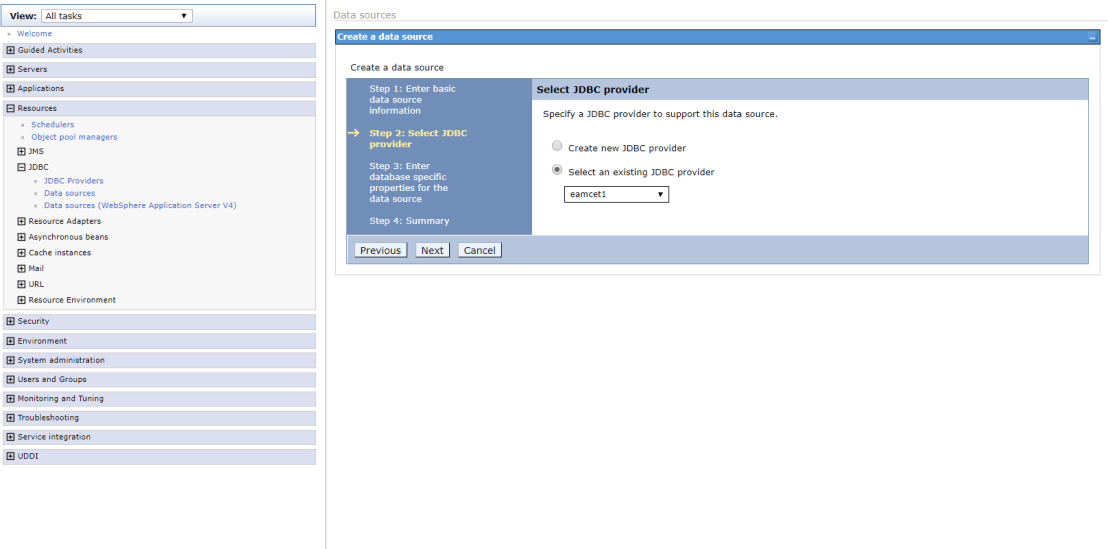
STEP 14:
Then click on >Next>Select>Select an existing jdbc provider(like eamcet1) like below
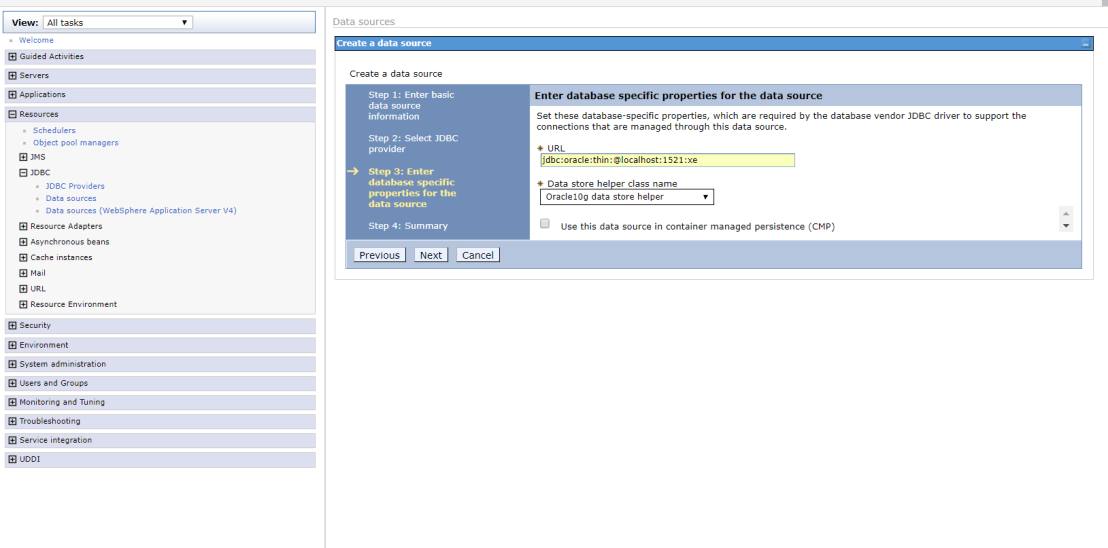
STEP 15:
Click on > Next>Enter >URL(jdbc:oracle:thin:@localhost1521:XE>And Select DataStore helper Class Name(like Oracle 10g datastore helper)>Remove selected CMP> like below
STEP 16:
Click on >Next like below
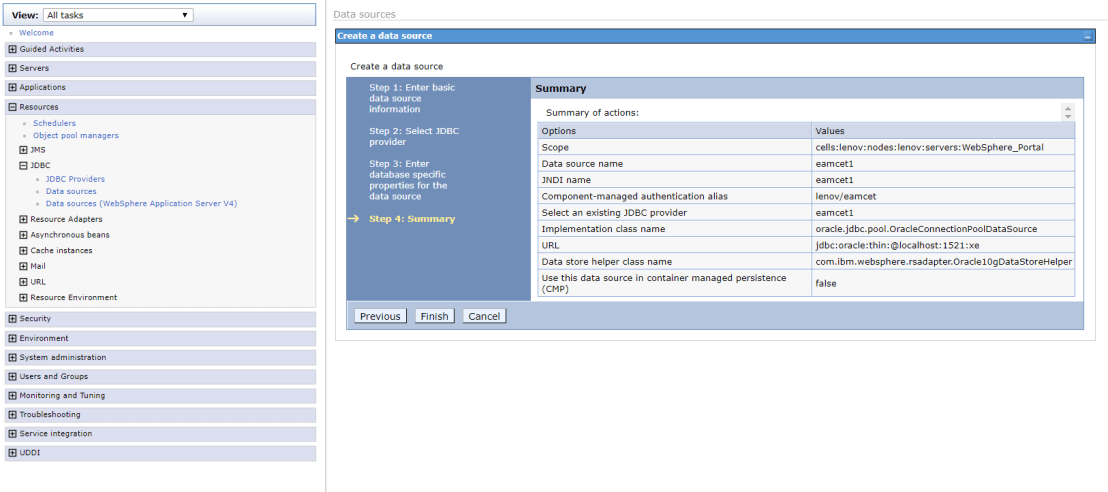
STEP 17:
Click >Finish >And Save like below
STEP 18:
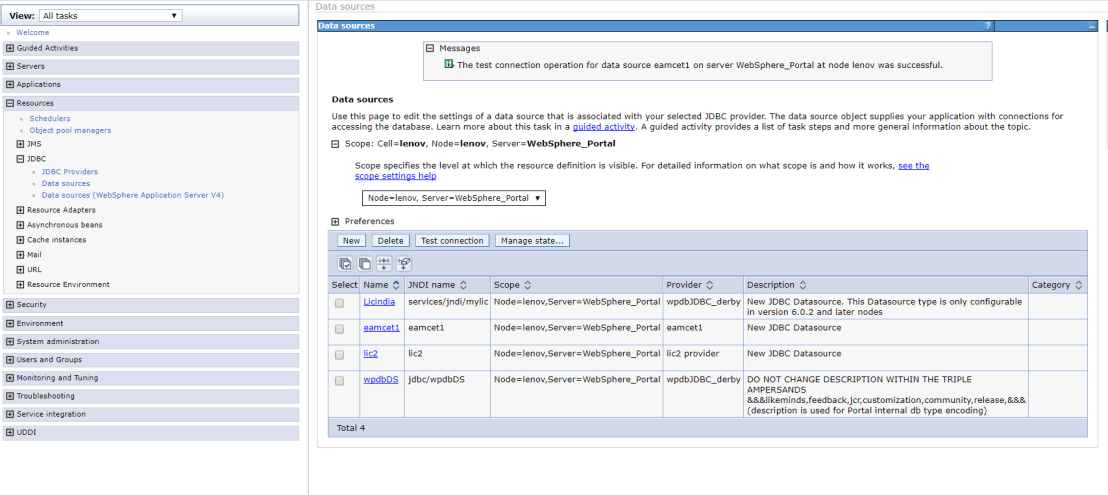
When you are created your preferences select (like eamcet1) then >click on Test Connection and Observe the Successful message like below.
=============================>END========================================

Você receberá instruções para criar uma nova senha.
LikeLike